

看到標題你一定想說,這麼簡單的東西,為何要寫一篇文章,
想當然爾,這篇文章一定是伴隨著怒氣寫出來的
沒事一個簡單的事情,它一定要搞得超複雜它才開心 Orz
需求很稀鬆平常,就是我有各種系統通知要串接 Microsoft Teams
簡單來說就是讓機器發訊息到 Teams 的指定群組
前前後後花了好長時間找文件,最後終於找到了
避免大家走彎路,就分享給大家
舊方式 Incoming webhooks (準備棄用)
有全網搜尋過就知道,以前舊的方式是使用 Incoming webhooks,
在 Teams 的左側欄的左下角有個 Apps 按下去,
然後搜尋「Incoming Webhook」
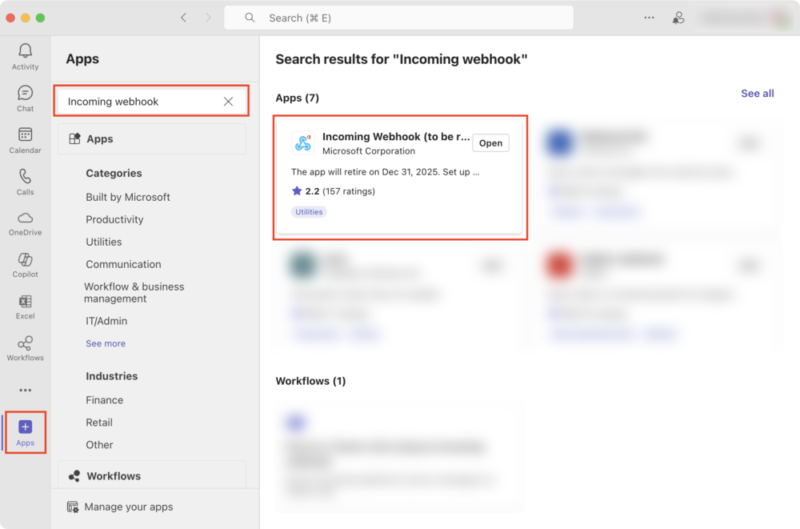
會看到這個 Incoming Webhook (to be retired)

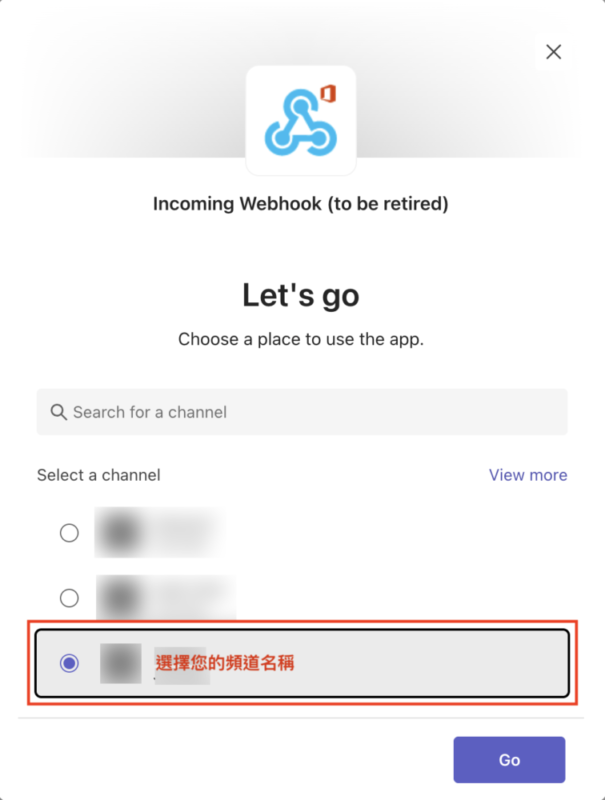
按照步驟,選擇你的頻道名稱
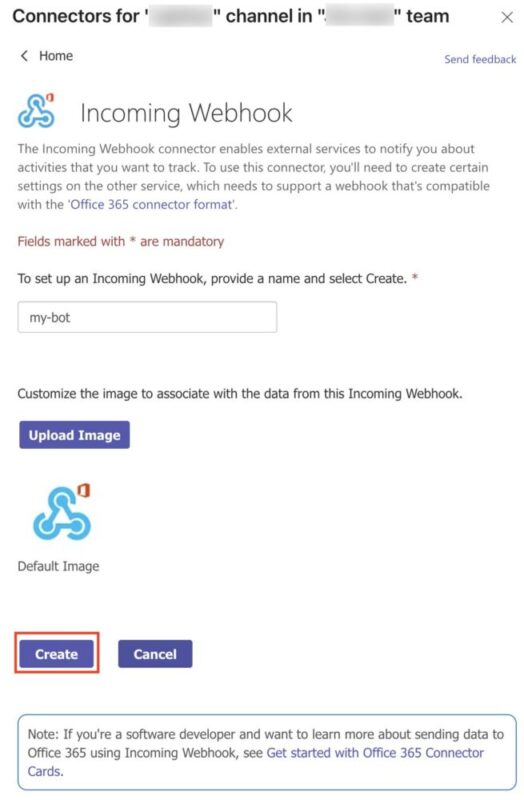
按下 Create
然後你就會得到一個 Webhook URL
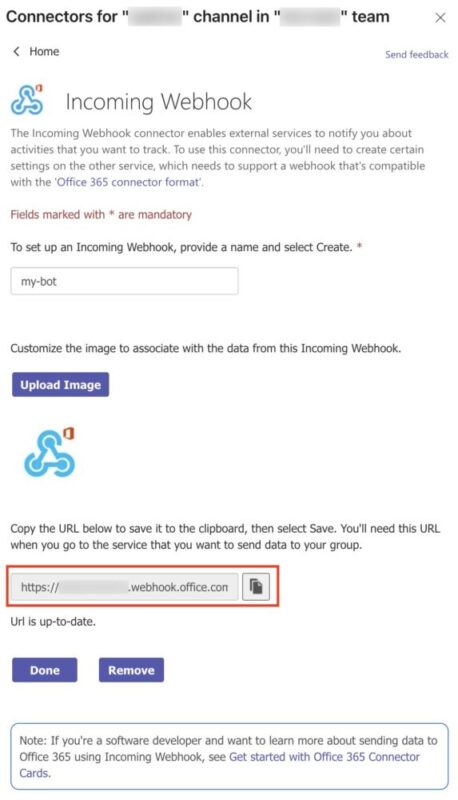
可能類似長這樣
https://xxxxxxxx.webhook.office.com/webhookb2/6dxxxxxx-xxxx-xxxx-xxxx-xxxxxxxxxxxx@xxxxxxxx-xxxx-xxxx-xxxx-xxxxxxxxx3f4/IncomingWebhook/bf0xxxxxxxxxxxxxxxxxxxxxxxxxxx54/40xxxxxx-xxxx-xxxx-xxxx-xxxxxxxxx3de/V2xx-xxxxxxxxxxxxxxxxxx_xxxxxxxxxxxxxxx_xxxxBF(這個就是 API 需要打的網址,網址每個人都不一樣)
呼叫它最簡單的方式就是,打一個 POST 到這個 URL,
內容帶入這個 JSON
{ "text": "My Test Message example" }正常會回 200 OK
習慣看 curl 的朋友,也附上 curl 的版本
curl --location 'https://xxxxxxxx.webhook.office.com/webhookb2/6dxxxxxx-xxxx-xxxx-xxxx-xxxxxxxxxxxx@xxxxxxxx-xxxx-xxxx-xxxx-xxxxxxxxx3f4/IncomingWebhook/bf0xxxxxxxxxxxxxxxxxxxxxxxxxxx54/40xxxxxx-xxxx-xxxx-xxxx-xxxxxxxxx3de/V2xx-xxxxxxxxxxxxxxxxxx_xxxxxxxxxxxxxxx_xxxxBF'
--data '{ "text": "My Test Message example" }'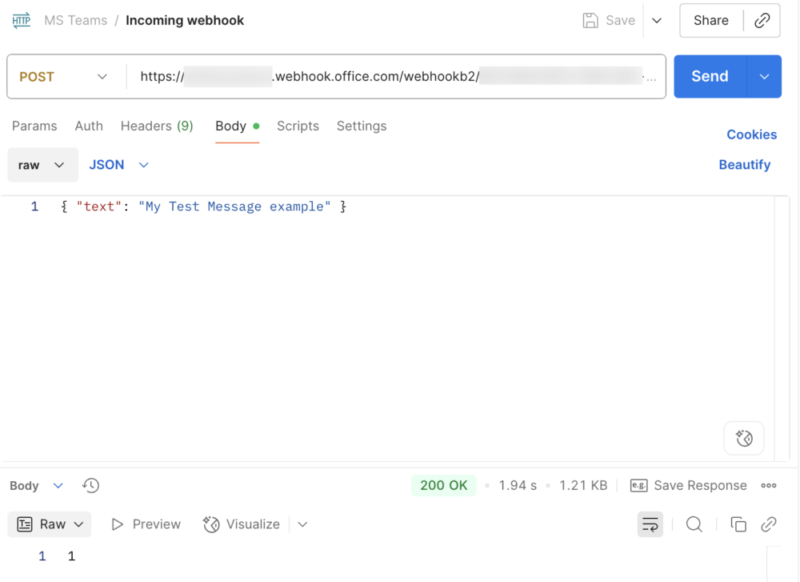
結案
但以上這段已經準備要 Deprecated (棄用) 了
新方式,使用 Workflows
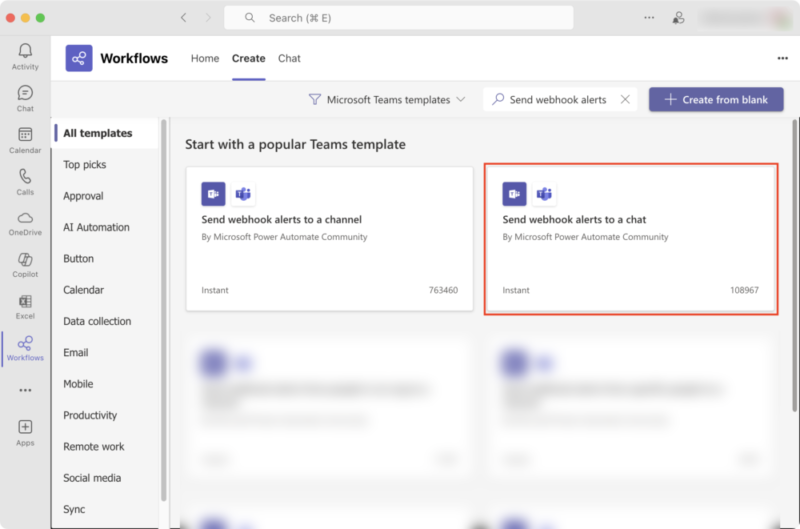
在 Teams 的左側欄的左下角有個 Apps 按鈕,按下去,
然後搜尋「Workflows」
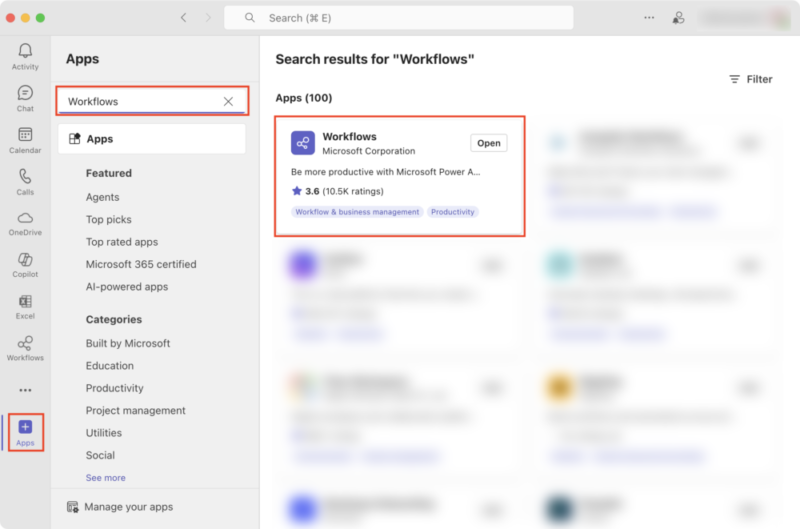
可能會很多個都叫 Workflows,找到確定是 Microsoft Corporation 才對哦!
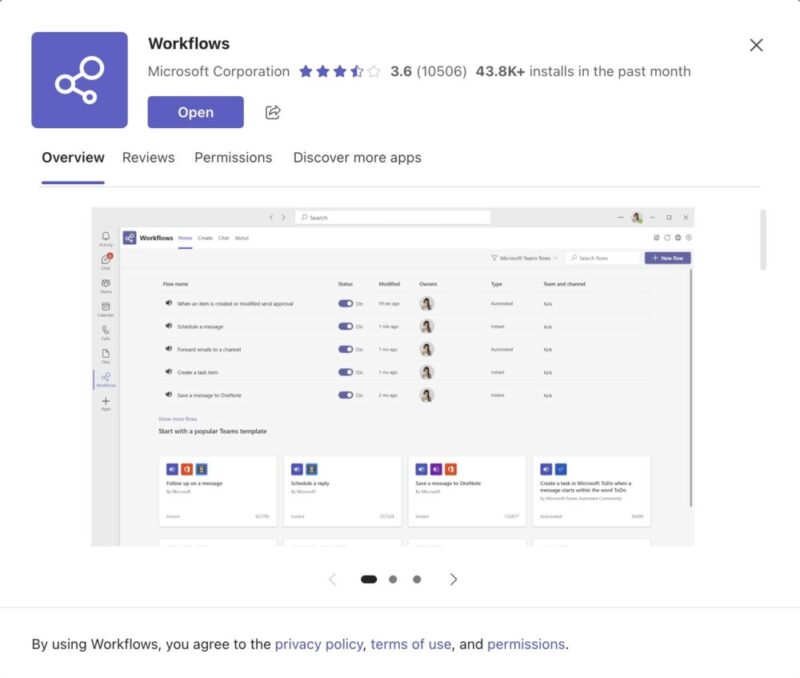
把它加進去 Teams 中
然後在左側標籤,按下 Workflows 的標籤
在上方找到 Create 標籤
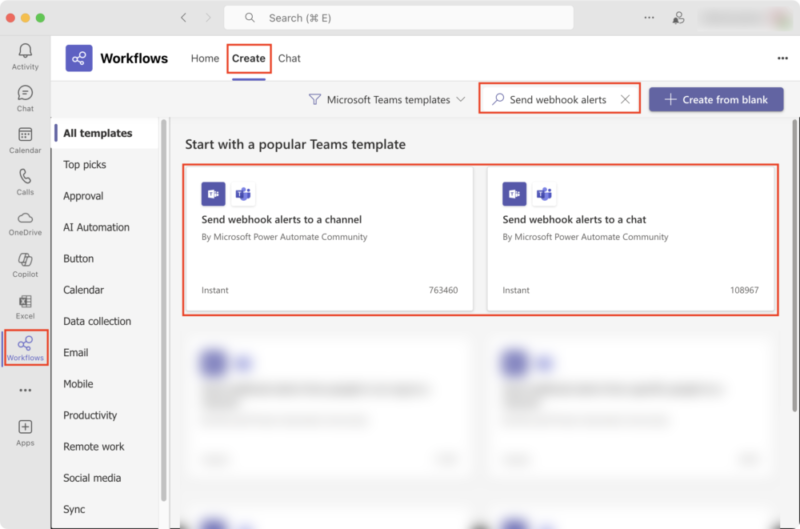
等等會用到 Send webhook alerts to a channel 或者 Send webhook alerts to a chat 等等分開說明
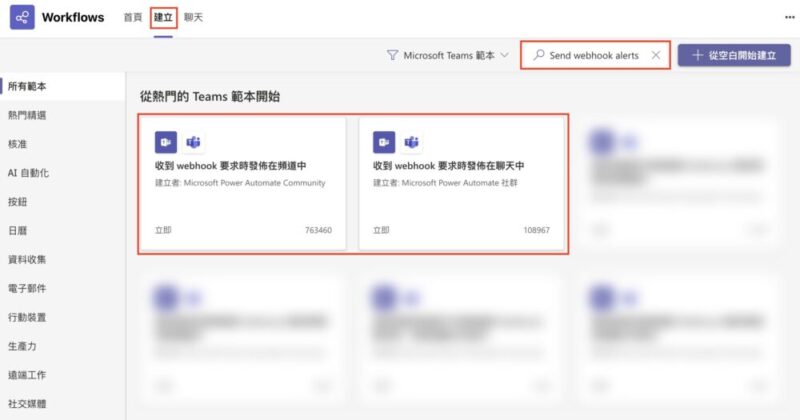
Send webhook alerts to a channel(收到 webhook 要求時發佈在頻道中)
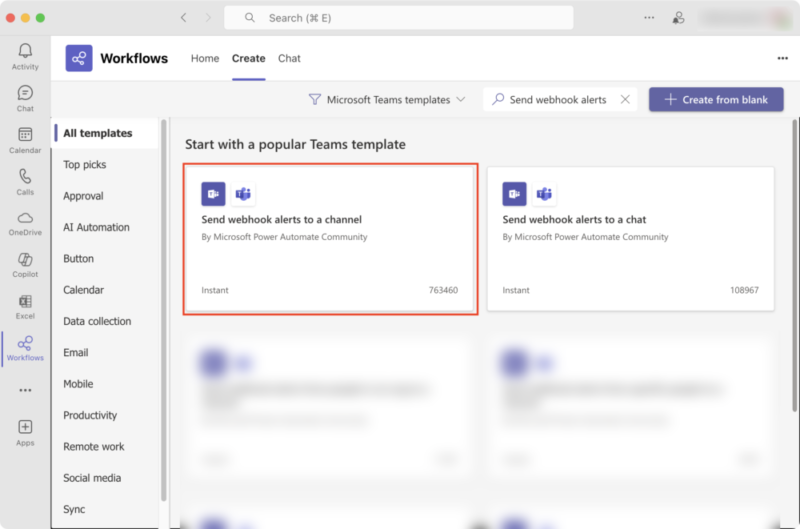
搜尋「Send webhook alerts to a channel」
中文名稱「收到 webhook 要求時發佈在頻道中」
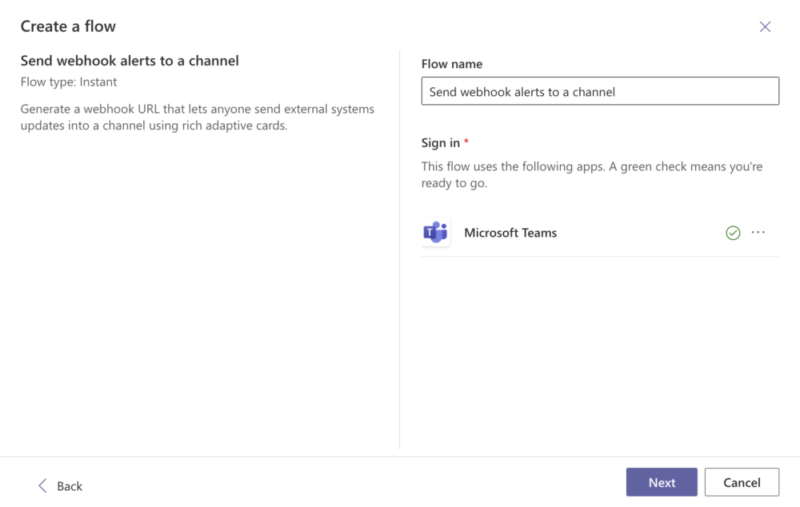
根據提示,選擇你的 Teams 與 Channel
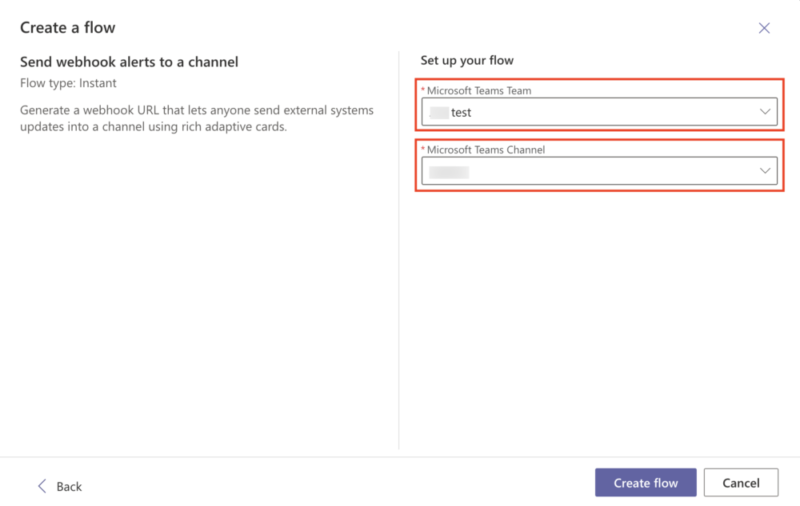
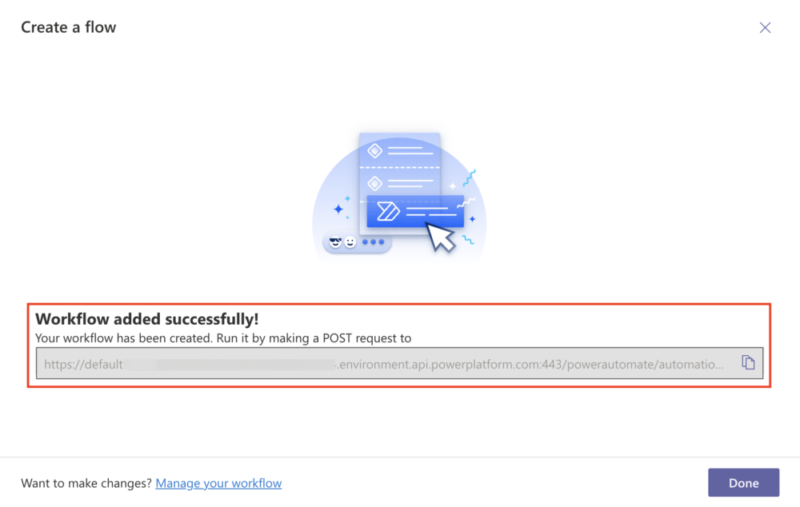
最後會出現一個網址
Send webhook alerts to a chat(收到 webhook 要求時發佈在聊天中)
搜尋「Send webhook alerts to a chat」
中文名稱「收到 webhook 要求時發佈在聊天中」
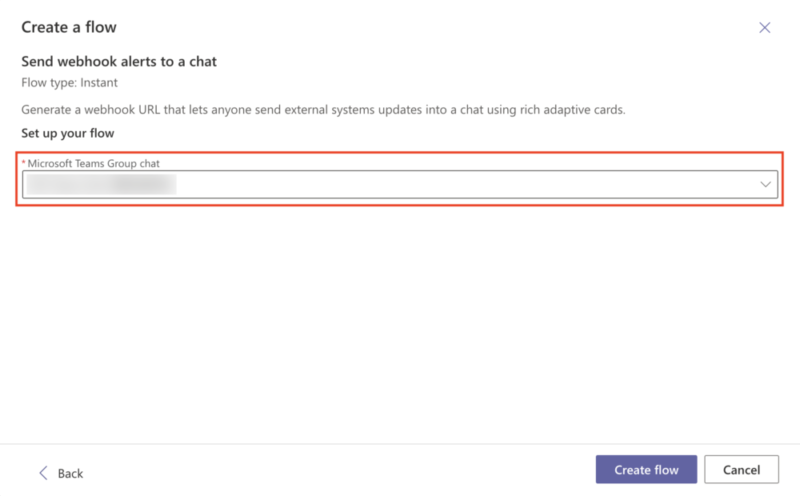
設定你想要丟訊息的群組名稱
不管這二種方式,最後會出現一個網址,像這樣
https://defaultxxxxxxxxxxxxxxxxxxxxxxxxxxxab0.xx.environment.api.powerplatform.com:443/powerautomate/automations/direct/workflows/2aaxxxxxxxxxxxxxxxxxxxxxxxxxx77d/triggers/manual/paths/invoke/?api-version=1&sp=%2Ftriggers%2Fmanual%2Frun&sv=1.0&sig=kmcxxxxxxxxxxxxxxxxxxxxxxxxxxxxxxxxxxxxxFBU(這個就是 API 需要打的網址,網址每個人都不一樣)
重點來了!!!
他的介面沒有交代你怎麼使用這個 API
在微軟的網站翻找超級久,終於找到他的 API 用法
API 文件在這裡(淚~~)
等等直接上範例說明
Workflows 發訊息到 Teams 簡單範例
打 POST 到你剛剛產生的網址
https://defaultxxxxxxxxxxxxxxxxxxxxxxxxxxxab0.xx.environment.api.powerplatform.com:443/powerautomate/automations/direct/workflows/2aaxxxxxxxxxxxxxxxxxxxxxxxxxx77d/triggers/manual/paths/invoke/?api-version=1&sp=%2Ftriggers%2Fmanual%2Frun&sv=1.0&sig=kmcxxxxxxxxxxxxxxxxxxxxxxxxxxxxxxxxxxxxxFBUBody 的部分選 Raw (JSON)
然後打上以下內容
{
  "type": "message",
  "attachments": [
    {
      "contentType": "application/vnd.microsoft.card.adaptive",
      "contentUrl": null,
      "content": {
        "$schema": "http://adaptivecards.io/schemas/adaptive-card.json",
        "type": "AdaptiveCard",
        "version": "1.5",
        "body": [
          {
            "type": "TextBlock",
            "text": "Hello, World",
            "wrap": true
          }
        ]
      }
    }
  ]
}
這就是最簡單的範例了
(別問我傳個文字訊息為何要搞這麼複雜…)
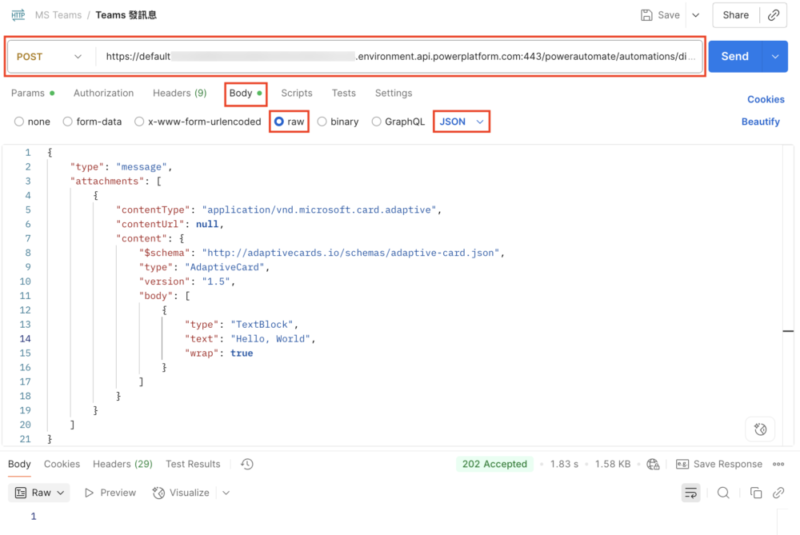
回應會是 202 Accepted 內容為空白
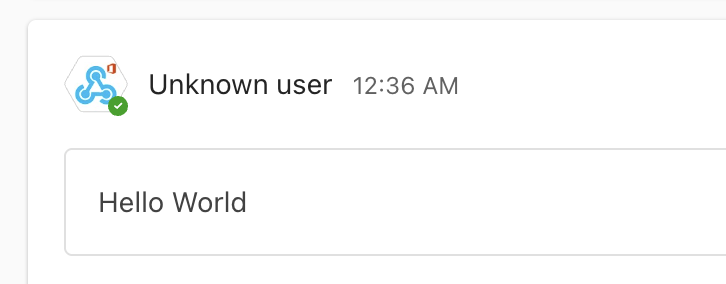
再檢查一下你的 Channel,應該就會看到訊息了
怕只看 curl 的朋友看不懂,這邊附上 curl 的版本
curl --location 'https://defaultxxxxxxxxxxxxxxxxxxxxxxxxxxxab0.xx.environment.api.powerplatform.com:443/powerautomate/automations/direct/workflows/2aaxxxxxxxxxxxxxxxxxxxxxxxxxx77d/triggers/manual/paths/invoke/?api-version=1&sp=%2Ftriggers%2Fmanual%2Frun&sv=1.0&sig=kmcxxxxxxxxxxxxxxxxxxxxxxxxxxxxxxxxxxxxxFBU'
--header 'Content-Type: application/json'
--data '{
"type": "message",
"attachments": [
{
"contentType": "application/vnd.microsoft.card.adaptive",
"contentUrl": null,
"content": {
"$schema": "http://adaptivecards.io/schemas/adaptive-card.json",
"type": "AdaptiveCard",
"version": "1.5",
"body": [
{
"type": "TextBlock",
"text": "Hello, World",
"wrap": true
}
]
}
}
]
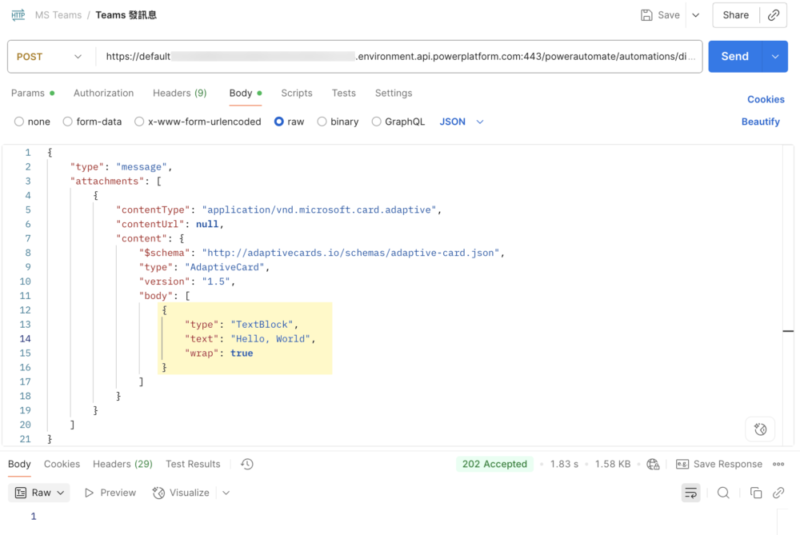
}'訊息長這樣

這個 JSON 格式在這裡是有講究的
- "type": "message"
- "contentType": "application/vnd.microsoft.card.adaptive"
- "contentUrl": null
這些值都是固定的
你能改的地方只有 body 這裡。
它是為了可以做特殊客製卡片訊息,放了很多保留參數在上面。
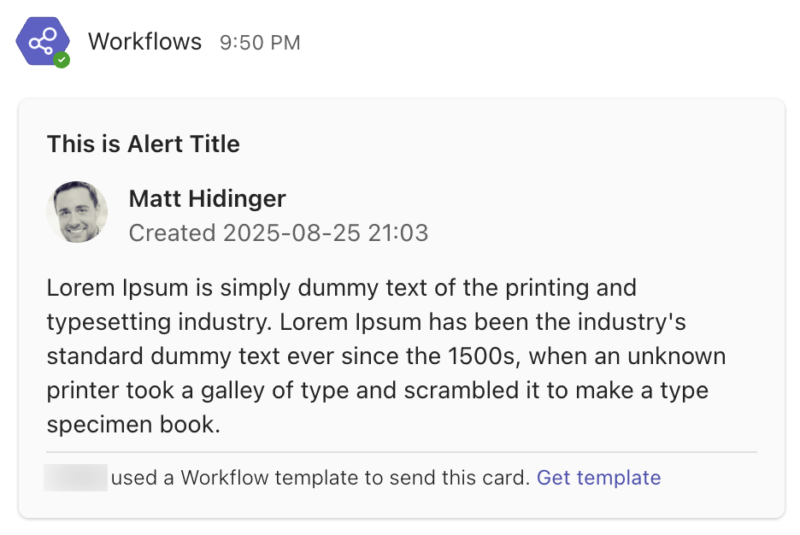
Workflows 發訊息到 Teams 複雜範例
放一個稍微複雜的範例
{
  "type": "message",
  "attachments": [
    {
      "contentType": "application/vnd.microsoft.card.adaptive",
      "contentUrl": null,
      "content": {
        "$schema": "http://adaptivecards.io/schemas/adaptive-card.json",
        "type": "AdaptiveCard",
        "version": "1.5",
        "body": [
          {
            "type": "TextBlock",
            "size": "Medium",
            "weight": "Bolder",
            "text": "This is my title"
          },
          {
            "type": "ColumnSet",
            "columns": [
              {
                "type": "Column",
                "items": [
                  {
                    "type": "TextBlock",
                    "weight": "Bolder",
                    "text": "Matt Hidinger",
                    "wrap": true
                  },
                  {
                    "type": "TextBlock",
                    "spacing": "None",
                    "text": "Created 2025-08-25 21:03",
                    "isSubtle": true,
                    "wrap": true
                  }
                ],
                "width": "stretch"
              }
            ]
          },
          {
            "type": "TextBlock",
            "text": "This is desc",
            "wrap": true
          }
        ]
      }
    }
  ]
}{
  "type": "message",
  "attachments": [
    {
      "contentType": "application/vnd.microsoft.card.adaptive",
      "contentUrl": null,
      "content": {
        "$schema": "http://adaptivecards.io/schemas/adaptive-card.json",
        "type": "AdaptiveCard",
        "version": "1.5",
        "body": [
          {
            "type": "TextBlock",
            "size": "Medium",
            "weight": "Bolder",
            "text": "This is Alert Title"
          },
          {
            "type": "ColumnSet",
            "columns": [
              {
                "type": "Column",
                "items": [
                  {
                    "type": "Image",
                    "style": "person",
                    "url": "https://pbs.twimg.com/profile_images/3647943215/d7f12830b3c17a5a9e4afcc370e3a37e_400x400.jpeg",
                    "size": "small"
                  }
                ],
                "width": "auto"
              },
              {
                "type": "Column",
                "items": [
                  {
                    "type": "TextBlock",
                    "weight": "Bolder",
                    "text": "Matt Hidinger",
                    "wrap": true
                  },
                  {
                    "type": "TextBlock",
                    "spacing": "None",
                    "text": "Created 2025-08-25 21:03",
                    "isSubtle": true,
                    "wrap": true
                  }
                ],
                "width": "stretch"
              }
            ]
          },
          {
            "type": "TextBlock",
            "text": "Lorem Ipsum is simply dummy text of the printing and typesetting industry. Lorem Ipsum has been the industry's standard dummy text ever since the 1500s, when an unknown printer took a galley of type and scrambled it to make a type specimen book.",
            "wrap": true
          }
        ]
      }
    }
  ]
}
這個可以做一個類似文章的小卡片
附上 curl 的版本
curl --location 'https://defaultxxxxxxxxxxxxxxxxxxxxxxxxxxxab0.xx.environment.api.powerplatform.com:443/powerautomate/automations/direct/workflows/2aaxxxxxxxxxxxxxxxxxxxxxxxxxx77d/triggers/manual/paths/invoke/?api-version=1&sp=%2Ftriggers%2Fmanual%2Frun&sv=1.0&sig=kmcxxxxxxxxxxxxxxxxxxxxxxxxxxxxxxxxxxxxxFBU'
--data '{
    "type": "message",
    "attachments": [
        {
            "contentType": "application/vnd.microsoft.card.adaptive",
            "contentUrl": null,
            "content": {
                "$schema": "http://adaptivecards.io/schemas/adaptive-card.json",
                "type": "AdaptiveCard",
                "version": "1.5",
                "body": [
                    {
                        "type": "TextBlock",
                        "size": "Medium",
                        "weight": "Bolder",
                        "text": "This is Alert Title"
                    },
                    {
                        "type": "ColumnSet",
                        "columns": [
                            {
                                "type": "Column",
                                "items": [
                                    {
                                        "type": "Image",
                                        "style": "person",
                                        "url": "https://pbs.twimg.com/profile_images/3647943215/d7f12830b3c17a5a9e4afcc370e3a37e_400x400.jpeg",
                                        "size": "small"
                                    }
                                ],
                                "width": "auto"
                            },
                            {
                                "type": "Column",
                                "items": [
                                    {
                                        "type": "TextBlock",
                                        "weight": "Bolder",
                                        "text": "Matt Hidinger",
                                        "wrap": true
                                    },
                                    {
                                        "type": "TextBlock",
                                        "spacing": "None",
                                        "text": "Created 2025-08-25 21:03",
                                        "isSubtle": true,
                                        "wrap": true
                                    }
                                ],
                                "width": "stretch"
                            }
                        ]
                    },
                    {
                        "type": "TextBlock",
                        "text": "Lorem Ipsum is simply dummy text of the printing and typesetting industry. Lorem Ipsum has been the industry'''s standard dummy text ever since the 1500s, when an unknown printer took a galley of type and scrambled it to make a type specimen book.",
                        "wrap": true
                    }
                ]
            }
        }
    ]
}'
卡片大概就是這樣使用
它有做一個卡片編輯器可以使用
https://adaptivecards.io/designer
你可以編輯成你喜歡的樣子之後,再拿來使用
取代 attachments[0].content 的部分就好
這樣就可以發送你自訂的訊息了
根據實測,這個 JSON 架構不要亂改
他的欄位是根據他文件定義的 JSON 架構去做的
如果你改了 JSON 架構,一樣會回應 202 Accepted
只是你在設定 Workflows 的時候會選不到指定欄位,這部分我暫時無解
另外它文件有提到小限制,
封包最大大約 28 KB,超過大小會回應 Request Entity too large.
整個測試最謎的地方就在這裡,
除非 JSON 格式錯誤,或者權限不足等問題,
不然他都會回應 202 Accepted
至少,看完整篇你會避掉一些雷,
有些方向不對的文件,就不要參考了
應該…是新版最簡單發訊息的方法,分享給大家。
相關資料
卡片編輯器
https://adaptivecards.io/designer
各種卡片範例
https://adaptivecards.io/samples/
參考資料
-
Microsoft Teams Webhook – When a Teams webhook request is received
https://learn.microsoft.com/en-us/connectors/teams/?tabs=text1%2Cdotnet&cf_lbyyhhwhyjj5l3rs65cb3w=j09h5ro1lgi6jiaolddgf#microsoft-teams-webhook -
如何設定 Microsoft Teams 的 Webhook 以接收 DSM 系統通知?
https://kb.synology.com/zh-tw/DSM/tutorial/configure_MSTeams_webhooks_for_DSM_notifications