[Ubuntu10.04] Apt-get指令用法和yum對照

我是Fedora派的,不管是Cent OS或Fedora都好好用
但我又被ubuntu的強大視窗特效和親合力很高的圖型介面所吸引
不過ubuntu是用debian系列的,指令介面用起來還是有點卡卡的,試試看也不錯。

我紀錄一下這指令用法,和做一些對照,YUM比較常用

引用:http://wiki.debian.org.hk/w/Install_software_with_APT

更新最新的軟件資料 (apt-get update)

YUM指令對照:yum update

在系統管理員帳戶(即root)下打「apt-get update」更新最新的軟件資料:

# apt-get update
下載:1 ftp://ftp.hk.debian.org stable/main Packages [3577kB]
已有 http://deb.opera.com stable/non-free Packages
略過 http://deb.opera.com stable/non-free Release
下載:2 ftp://ftp.hk.debian.org stable/main Release [82B]
下載:3 ftp://ftp.hk.debian.org stable/main Sources [1415kB]
讀取 4992kB 用了 11s (159kB/s)
讀取套件清單中... 完成

搜尋軟件 (apt-cache search)

YUM指令對照:yum search 關鍵字

先用 “apt-cache search 關鍵字 ...” 搜尋軟件:

$ apt-cache search image manipulate
cinepaint - motion picture image painting and retouching tool
fujiplay - Interface for Fuji digital cameras
gnubik - 3D Rubik's cube game
gtkmorph - Digital image warp and morph (gtk)
gtkmorph-example - digital image warp and morph, examples
imagemagick - Image manipulation programs
jhead - manipulate the non-image part of Exif compliant JPEG files
jpegpixi - Remove hot spots from JPEG images with minimal quality loss

安裝軟件 (apt-get install)

YUM指令對照:yum install  套件名稱

apt-get install 套件名稱

# apt-get install imagemagick
Reading Package Lists... Done
Building Dependency Tree... Done
Suggested packages:
html2ps lpr
The following NEW packages will be installed:
imagemagick
0 upgraded, 1 newly installed, 0 to remove and 0 not upgraded.
Need to get 0B/1466kB of archives.
After unpacking 5325kB of additional disk space will be used.
Selecting previously deselected package imagemagick.
(Reading database ... 60636 files and directories currently installed.)
Unpacking imagemagick (from .../imagemagick_6%3a6.0.6.2-2.4_i386.deb) ...
Setting up imagemagick (6.0.6.2-2.4) ...

移除軟件 (apt-get remove)

要移除套件,可以在系統管理員帳戶(即root)下打「apt-get remove 套件名稱」,APT就會把所指定的套件和相依的套件一併移除。不過apt-get remove不會移除套件所屬的設定檔,要把設定檔也一併移除,就要加入選項「--purge」。

YUM指令對照:yum erase 套件名稱

# apt-get --purge remove imagemagick
Reading Package Lists... Done
Building Dependency Tree... Done
The following packages will be REMOVED:
imagemagick*
0 upgraded, 0 newly installed, 1 to remove and 0 not upgraded.
Need to get 0B of archives.
After unpacking 5325kB disk space will be freed.
Do you want to continue? [Y/n]
(Reading database ... 60867 files and directories currently installed.)
Removing imagemagick ...
Purging configuration files for imagemagick ...

顯示個別軟件詳細資訊 (apt-cache show) (很少用)

YUM指令對照:yum list 套件名稱

如果想知道個別套件詳細資訊,可以打 "apt-cache show 套件名稱":

$ apt-cache show imagemagick
Package: imagemagick
Priority: optional
Section: graphics
Installed-Size: 5200
Maintainer: Ryuichi Arafune <[email protected]>
Architecture: i386
Version: 6:6.0.6.2-2.4
Replaces: imagemagick-doc, geomview (<= 1.8.0)
Depends: libmagick6 (= 6:6.0.6.2-2.4)
Suggests: gs, html2ps, lpr
Conflicts: imagemagick-doc
Filename: pool/main/i/imagemagick/imagemagick_6.0.6.2-2.4_i386.deb
Size: 1465598
MD5sum: 4b9eb6cda5f5fe0c20040c9647ee2b6f
Description: Image manipulation programs
Imagemagick is a set of programs to manipulate various image formats
(JPEG, TIFF, PhotoCD, PBM, XPM, etc...). All manipulations can
be achieved through shell commands as well as through a X11 graphical
interface (display).
.
Possible effects: colormap manipulation, channel operations, thumbnail
creation, image annotation, limited drawing, image distortion, etc...
.
This package suggests a postscript interpreter (gs) to read postscript
files. It will however function happily without it (as long as you don't
want to read postscript).

[Fedora12] 開機失敗

最近遇到選完GRUB選單,然後Fedora開機卡住的問題

螢幕只剩下一個小點點 (或底線 _ ) 在那邊閃呀閃


硬體是HP dx2000mt的電腦      Intel 865GV晶片組

引用:http://lkml.indiana.edu/hypermail/linux/kernel/0308.1/1105.html
https://bugzilla.redhat.com/show_bug.cgi?id=521423


查到是說,是ACPI(進階電源管理)的問題

關於ACPI,這裡有他的很棒的說明

http://www.delightpress.com.tw/article_c.aspx?article_id=8

簡單說就是控制電腦在休眠待命和關機的一些電源控制
作業系統需要偵測硬體和與BIOS做溝通

如果你也是遇到這種問題,先把核心參數

rhgb quiet

這二個拿掉,才能顯示詳細的內容


然後嘗試加上

acpi=ht

這是針對核心有HT技術的硬體架構所開發 (Intel ICH5 APIC)
可以略過一些硬體偵測,又可以打開Hyper-threading技術

如果嘗試這個不行

只好使用這個相容性最高的參數

acpi=off

當然,在關機時不能自動軟關機


如果不行的話可以依序試試

acpi=noirq

pci=routeirq

pci=noacpi

acpi=noirq

pci=nomsi


——————————————————————————————————-

引用:http://www.cyberciti.biz/howto/question/static/linux-kernel-parameters.php

其他開機核心參數

        acpi=           [HW,ACPI] Advanced Configuration and Power Interface
                        Format: { force | off | ht | strict | noirq }
                        force — enable ACPI if default was off
                        off — disable ACPI if default was on
                        noirq — do not use ACPI for IRQ routing
                        ht — run only enough ACPI to enable Hyper Threading
                        strict — Be less tolerant of platforms that are not
                                strictly ACPI specification compliant.


        pci=option[,option…]  [PCI] various PCI subsystem options:
                off             [IA-32] don’t probe for the PCI bus
                bios            [IA-32] force use of PCI BIOS, don’t access
                                the hardware directly. Use this if your machine
                                has a non-standard PCI host bridge.
                nobios          [IA-32] disallow use of PCI BIOS, only direct
                                hardware access methods are allowed. Use this
                                if you experience crashes upon bootup and you
                                suspect they are caused by the BIOS.
                conf1           [IA-32] Force use of PCI Configuration
                                Mechanism 1.
                conf2           [IA-32] Force use of PCI Configuration
                                Mechanism 2.
                nosort          [IA-32] Don’t sort PCI devices according to
                                order given by the PCI BIOS. This sorting is
                                done to get a device order compatible with
                                older kernels.
                biosirq         [IA-32] Use PCI BIOS calls to get the interrupt
                                routing table. These calls are known to be buggy
                                on several machines and they hang the machine
                                when used, but on other computers it’s the only
                                way to get the interrupt routing table. Try
                                this option if the kernel is unable to allocate
                                IRQs or discover secondary PCI buses on your
                                motherboard.
                rom             [IA-32] Assign address space to expansion ROMs.
                                Use with caution as certain devices share
                                address decoders between ROMs and other
                                resources.
                irqmask=0xMMMM  [IA-32] Set a bit mask of IRQs allowed to be
                                assigned automatically to PCI devices. You can
                                make the kernel exclude IRQs of your ISA cards
                                this way.
                pirqaddr=0xAAAAA        [IA-32] Specify the physical address
                                of the PIRQ table (normally generated
                                by the BIOS) if it is outside the
                                F0000h-100000h range.
                lastbus=N       [IA-32] Scan all bus
es thru bus #N. Can be
                                useful if the kernel is unable to find your
                                secondary buses and you want to tell it
                                explicitly which ones they are.
                assign-busses   [IA-32] Always assign all PCI bus
                                numbers ourselves, overriding
                                whatever the firmware may have done.
                usepirqmask     [IA-32] Honor the possible IRQ mask stored
                                in the BIOS $PIR table. This is needed on
                                some systems with broken BIOSes, notably
                                some HP Pavilion N5400 and Omnibook XE3
                                notebooks. This will have no effect if ACPI
                                IRQ routing is enabled.
                noacpi          [IA-32] Do not use ACPI for IRQ routing
                                or for PCI scanning.
                routeirq        Do IRQ routing for all PCI devices.
                                This is normally done in pci_enable_device(),
                                so this option is a temporary workaround
                                for broken drivers that don’t call it.
                firmware        [ARM] Do not re-enumerate the bus but instead
                                just use the configuration from the
                                bootloader. This is currently used on
                                IXP2000 systems where the bus has to be
                                configured a certain way for adjunct CPUs.


[Fedora 12]VGA顯卡的相關顯示問題

文字模式顯示問題

引用:https://fedoraproject.org/wiki/Common_F12_bugs#Miscellaneous_problems_with_Intel_graphics_adapters

我的硬體是Intel 865GV晶片組的內建顯卡82865G

在裝fedora 12時,只要是在文字模式載入的時候(類似DOS)
螢幕就會顯示Not Supported Mode (螢幕不支援的顯示模式)
進入圖型模式後就正常了


原因是說Linux錯的驅動(或是沒有驅動)導致在顯示的時候出不來
(好像是VESA Driver吧,反正網路上找也沒有適合的)

解法只要在Grub選單的時侯,在Fedora (2.6.32.11-99.fc12.i686)
按下e,然後加入

nomodeset

這樣就會正常跑出loading的Bar了

修改grub.conf (或是menu.lst)

#vi /boot/grub/grub.conf

我列出我的其中一項

title Fedora (2.6.32.11-99.fc12.i686)
        root (hd0,1)
        kernel /boot/vmlinuz-2.6.32.11-99.fc12.i686 ro root=UUID=83ef3ac6-d581-4536-a6bb-6a06c9060094 noiswmd LANG=en_US.UTF-8 SYSFONT=latarcyrheb-sun16 KEYBOARDTYPE=pc KEYTABLE=us rhgb quiet nomodeset
        initrd /boot/initramfs-2.6.32.11-99.fc12.i686.img


版號請以你的為主,在kernel那行的最後
KEYTABLE=us rhgb quiet加上nomodeset

就OK了

——————————————————————————————–

如果想修改在文字模式的顯示解析度

可以用上述方式再加上

vga=791

代表是用1024×768的32位元全彩顯示
(迷之音:還真豪華…)

如果想相同性高一些(像我這種電腦)

在kernel那行的最後,去除rhgb quiet參數,加上

nomodeset vga=769

這樣就會有最多的資訊了(當然開機還沒進桌面前都蠻醜的)
(註:rhgb代表圖形用顯示開機情況,較美觀。而quiet代表不顯示詳細訊息)


以下是其他常用的解析度參數,不含括號的註解
引用:http://soft.zdnet.com.cn/software_zone/2007/1011/545493.shtml

vga=769 (640x480x256) 
vga=771 (800x600x256)
vga=788 (800x600x645536)
vga=773 (1024x768x256)
vga=791 (1024x768x65536)


——————————————————————————————–

沒有顯示滑鼠游標

之後又發現一個問題,就是在登入後進入桌面時,沒有顯示滑鼠游標


引用:http://phorum.vbird.org/viewtopic.php?f=2&t=33926&view=previous

: 在進去的藍色畫面時都還可以看到滑鼠,
: 可是當他變成登入的畫面時,滑鼠圖案消失了!!
: 滑鼠其實一直都存在,因為我有移動滑鼠亂點確實還可以點擊,
: 但是滑鼠的圖案卻都看不到,有沒有人遇到這個問題??
: 要怎樣解決這個問題呢?? 謝謝教導。

像是文章說的

我的解決辦法是在xorg.conf下改參數

但Fedora 12預設不會幫我們產生/etc/X11/xorg.conf

先執行
#Xorg -configure :1
增測硬體設備

#mv /etc/X11/xorg.conf.new /etc/X11/xorg.conf
移動設定檔到/etc/X11/xorg.conf

然後修改之

#vi /etc/X11/xorg.conf

Section “Device”
### Available Driver options are:-
### Values: <i>: integer, <f>: float, <bool>: “True”/”False”,
### <string>: “String”, <freq>: “<f> Hz/kHz/MHz”
### [arg]: arg optional
#Option “NoAccel” # [<bool>]
#Option “SWcursor” # [<bool>]
#Option “ColorKey” # <i>
#Option “CacheLines” # <i>
#Option “Dac6Bit” # [<bool>]
#Option “DRI” # [<bool>]
#Option “NoDDC” # [<bool>]
#Option “ShowCache” # [<bool>]
#Option “XvMCSurfaces” # <i>
#Option “PageFlip” # [<bool>]
Identifier “Card0”
Driver “intel”
VendorName “Intel Corporation”
BoardName “82865G Integrated Graphics Controller”
BusID “PCI:0:2:0”

Option “NoAccel” “True”
Option “SWcursor” “True”

EndSection


在上述區塊加入紅色的字,然後登出再登入即可
好像每張卡的都不太一樣
像文章裡寫到

BoardName “nVidia Corporation C51 PCI Express Bridge”
下面加入這一行
Option “HWcursor” “false”
登出再登入,就行了!

我的顯卡就沒有上述說的那個參數
如果我的方法不能使用,可以試試看他的

———————————————————————————————

後記:

google到cent os 5也有這問題
http://www.samtseng.liho.tw/~samtz/blog/?p=2488
CentOS 5 滑鼠指標消失的問題
編輯 /etc/X11/xorg.conf 檔案 加入 Option “HWCursor” “off”

我的另一台電腦也裝了Fedora 12和ubuntu,也有這前者的問題
顯卡是Ati Radeon 9550

似乎有Driver,嘗試安裝中…..

[轉貼] linux使用wget透過proxy抓取檔案

  
所以在linux使用wget抓取檔案,若要透過proxy 必須如下:

vi /etc/wgetrc,找到以下兩行,並將以下參數

 #passive_ftp = off <- 是否關閉 passive mode
 #http_proxy = http://163.28.80.40:3128/ <- 設定台中區網的 proxy ip

 前面的 # 刪除後,修改為

passive_ftp = off
http_proxy=http://163.28.80.40:3128/
ftp_proxy = http://163.28.80.40:3128/
use_proxy = on

存檔後再用 wget 抓檔就會比較快了

[linux bash] 建立格式化過的Shell Script

#!/bin/bash
#————————————
#Time:2010/05/03 22:41
#Author:Johnny
#Comment:建立一個屬於自己格式的Shell Script
#————————————

# 檢查參數是否足夠
[ “$#” -lt 1 ] && echo “ERROR: Missing arguments (less than 1).” \
        && exit 0

# 檢查檔案是否存在,不存在就建立
if [ “$(cat $1)” == ” ]; then
echo “File Created.”
else
echo “ERROR: File exist.” && exit 0
fi

# 建立其檔案內容(註:中間的註解也會被寫入,中間可以修改作者的名字)
cat > $1 <<end
#!/bin/bash
#————————————
#Time:$(date +%Y)/$(date +%m)/$(date +%d) $(date +%H):$(date +%M)
#Author:Johnny
#Comment:
#————————————
end
# 該屬性更改為可執行的檔案
chmod +x $1

我在這裡解釋一下這要怎麼用

將其存成mksh,可以直接放在/bin下

就可以直接打

$ mksh test.sh

就會有一個自己格式的shell script了

$ cat test.sh

#!/bin/bash
#————————————
#File:test.sh
#Time:2010/05/03 23:35
#Author:Johnny
#Comment:
#————————————

[Fedora12] 一些雜項設定

WindowsXP和Fedora的時間不同步

Screenshot.png 

WindowsXP和Fedora 12 linux的雙系統環境下,時間一直會不同步? 

(XP下使用正常,但切到Fedora後時間雖然正確,但回到XP後時間就會差8個小時)

http://hi.baidu.com/wyl0367/blog/item/8333cdfa0a82de9e58ee90cd.html

原因在於BIOS的時間沒有存時區,而Fedora預設會以UTC時間存到BIOS裡

「系統」→「管理」→「時間和日期」→「時區」,把UTC的勾去掉,就行了

System -> Administraton -> Date & Time

Time Zone頁籤下,System Clock uses UTC 勾勾取消


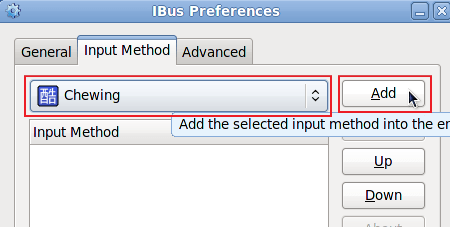
新酷音的符號輸入方法

引用:http://briian.com/?p=404

 Linux下開啟新酷音輸入法請見:http://j796160836.pixnet.net/blog/post/25444345

Screenshot-IBus Preferences-1.png  

當我們用「新酷音輸入法」在輸入中文字時,可以按一下鍵盤上左上角的「~」按鍵,便可出現剛剛設定的特殊符號選單,我們可以用鍵盤上下左右鍵來選擇想要輸入的符號。(空白鍵換頁)

建議鉤上幾個選項

自動移游標,這選項才會和新注音的感覺差不多,要刪預先字時才不會刪錯

Esc鍵清理預編區

輸入風格可以依照喜好來設定


開機自動打開Numlock

引用:http://www.linuxquestions.org/questions/fedora-35/numlock-key-turn-on-420427/

可以裝一個很簡單的套件numlockx

numlockx.i686 : NumLockX turns on NumLock after starting X


YUM掛Proxy下載套件

引用:http://www.fedoraforum.org/forum/showthread.php?s=&threadid=7

修改yum.conf

vi /etc/yum.conf

在裡面加入一行

http_proxy=http://strong>user:passwd@proxy.foo.com:portnumber

上述的

user為帳號,passwd為密碼,proxy.foo.com為proxy的位址,portnumber為連接埠號


[轉貼]詳解-OpenVPN中的routing

這文章的前半段還有看懂一些,之後的文章就不OK了
備忘起來慢慢看

網路概論我超不熟的啦>”<


原文出處http://cheaster.blogspot.com/2009/11/openvpnrouting.html

在網路上有很多教學,會叫你把vpn當做default-route-gateway…但,這樣很容易一失敗就造成server本身外連有問題…如果外連有問題,你想遠端修改都不行…所以,我強烈建議不熟routing是啥東東西,不要太輕易就把server本機的default-route給改掉…

以linux上來看,假設本機實體網路卡eth0使用的ip-address為[192.168.1.1/32][gateway=192.168.1.254],vpn網卡tun0/tap0使用的ip-address為[10.8.0.1/24]/p–t–p[10.8.0.2/24]=gateway,指令[route -n]=表a

表a:
dest/mask,gateway,dev
10.8.0.2/32,0.0.0.0,tun0
10.8.0.0/24,10.8.0.2,tun0
192.168.1.0/24,0.0.0.0,eth0
0.0.0.0/0,192.168.1.254,eth0

上面這一塊,有上過網路管理課程的朋友一定很了解,我就大至上講一下,routing-table就是告訴電腦的封包該往哪走…用白話一點描述就是

  1. 封包-a想去10.8.0.1~10.8.0.255的地方,必須到10.8.0.2的門口排隊
  2. 封包-b想去192.168.1.1~192.168.1.255的地方,必須到0.0.0.0的門口排隊
  3. 不想去上面二個地方,而想去別處的,就通通到192.168.1.254的門口排隊

想去的地方,就是routing-table上的dest(目的地),門口就是gateway,dev指的就是你的實體設備(電腦中叫網路卡)

所以我以vpn+nat的方式來表述一下

vpn-client[10.8.0.10/32]/tun0-vpn-server[10.8.0.1/32]/tun0-vpn-gateway[10.8.0.2/32]
eth0-實體網路[192.168.1.1/32]/eth0-實體網路-gateway[192.168.1.254/32]
表a就是這一台啟動vpn服務的routing-table

以一般我們vpn-server-conf的預設,若無特別設定的話,client端除了本身自有的網路產生的路由表(routing-table),還會因為連上vpn-service時產生的dest:10.8.0.0/24,gateway:vpn_gateway(絕對不會是10.8.0.2/32,因為vpn的gateway是vpn-service去操控的,只要你設定正常…基本上不用理)

所以到這面為止,綜合basic-setting的話,你會發現,vpn只有讓10.8.0.0/24互通而已…也就是client[10.8.0.10]可以連到server[10.8.0.0/24]…這也就是server.conf中client-to-client的用意(不過,不啟用client-to-client也會有這個routing…因為這算是vpn-lan中的default-route…client-to-client只是告訴vpn-service,client們可以互相連繫)

但我用vpn是為了可以方面連到學校內部,因為學校有一些內部的管理只能允許校內ip,所以,vpn就得配合nat的方式出去

在[OpenVPN–純架設-by ssl]的routing/nat/forward做過說明了…所以,在此我就先當做你server端的vpn-input/output/forward/nat已設定在iptables上了…接著,我就來說說怎麼設定routing-table

在server.conf中,你會看到一些用[push “xxxxxxxxxxxxxxxxxx”]的東東,這push的意思就是把後面引號中的東西設定到client去…若你在server.conf看到[xxxxxxxxxxxxxx]沒引號也沒push的話,那代表是設定在server上…以上我舉幾個例子

a—[讓vpn-client可以透過vpn的tunnel連到學校192.168.10.0/24區域]

在server.conf寫:
push “192.168.10.0 255.255.255.0”
上面的意思轉成手動寫routing-table的話就是
[route add 192.168.10.0/24 vpn_gateway dev tun0]

b—[讓vpn-client可以透過vpn的tunnel連到學校192.168.10.0/24區域,但192.168.10.5/32不希望client用vpn-tunnel]

在server.conf寫:
push “192.168.10.5 255.255.255.255 net_gateway”
push “192.168.10.0 255.255.255.0”
跟a的意思一樣,只是192.168.10.5/32特別指定不要用vpn_gateway,而照client的default_gateway走

以上兩個,只要你本身server的forward與nat在iptables設定正確的話…你可以在client用trace-route去測,正確的trace-route的表應該是

client-windows-xp
cmd<—-tracert 192.168.10.1
1 1ms 1ms 1ms —- vpn_gateway(10.8.0.1)
2 ?ms ?ms ?ms —- 192.168.1.254(server-eth0-gateway)
3 ?ms ?ms ?ms —- 192.168.10.1
當然,2跟3中間會因為你經過的網路設備而有其他的gateway會回應

如果你trace-route的第一個gateway不是vpn_gateway的話,那你最好檢查一下你client的routing-table…因為,如果你client本身所在的網路就是在192.168.10.0/24的話,基本上,應該不會走vpn_gateway
又或者你自己已有設定routing-table在client端…要記住一件事,routing-table的優先順序會從最小範圍先走<—不懂啥意思,沒關係,我再舉個例子,我假設有底下routing-table-表b,如果我現在要連1.1.1.1,1.1.2.1,1.3.1.1,4.1.1.1,1.1.1.129會怎麼走

routing-table-表b
dest,gateway
1——1.1.1.0/24,gw-a
2——1.1.1.128/25,gw-e
3——1.1.0.0/16,gw-b
4——1.0.0.0/8,gw-c
5——0.0.00/0,gw-d

1.1.1.1—->gw-a
1.1.2.1—->gw-b
1.3.1.1—->gw-c
4.1.1.1—->gw-d
1.1.1.129–>gw-e
其實重點只有1.1.1.1跟1.1.1.129…這兩是同一個class-c,為什麼1.1.1.1會走gw-a,而1.1.1.129不走gw-a而走gw-e
因為routing-table中的1—>1.1.1.0/24—>範圍是指1.1.1.0~1.1.1.255—>256
而2—->1.1.1.128/25—>範圍是指1.1.1.128~1.1.1.255—>128
routing會挑範圍小的先走…就是這意思…(不過上面的算法應該是不會把網路位址跟廣播位址算進去啦)

以上…就是小小的說明在OpenVPN中,怎麼設定server/client的路由走向…
設定的好的話,基本上可以在server把openvpn的服務多開幾個,設定多個tun/tap的虛擬網卡,server.conf也可以寫多個不同的…記得port要用不同的,然後你就可以控制什麼使用者用啥port連入vpn-server時,會走什麼樣的routing…這樣也不怕會有人偷渡…

當然,server可以多config開多,client也行…但如果你server或client是windows的,記得要手動新增vpn虛擬網卡,各設定檔之間是不能共用一個虛擬網卡的,記得,dhcp給的ip最好也自己設定一下…反正虛擬ip蠻多可以用的…

class-A->10.0.0.0/8
class-B->172.16.0.0/11
class-C->192.168.0.0/16

應該吧…不然就google查一下就行了 在網路上有很多教學,會叫你把vpn當做default-route-gateway…但,這樣很容易一失敗就造成server本身外連有問題…如果外連有問題,你想遠端修改都不行…所以,我強烈建議不熟routing是啥東東西,不要太輕易就把server本機的default-route給改掉…

以linux上來看,假設本機實體網路卡eth0使用的ip-address為[192.168.1.1/32][gateway=192.168.1.254],vpn網卡tun0/tap0使用的ip-address為[10.8.0.1/24]/p–t–p[10.8.0.2/24]=gateway,指令[route -n]=表a

表a:
dest/mask,gateway,dev
10.8.0.2/32,0.0.0.0,tun0
10.8.0.0/24,10.8.0.2,tun0
192.168.1.0/24,0.0.0.0,eth0
0.0.0.0/0,192.168.1.254,eth0

上面這一塊,有上過網路管理課程的朋友一定很了解,我就大至上講一下,routing-table就是告訴電腦的封包該往哪走…用白話一點描述就是

  1. 封包-a想去10.8.0.1~10.8.0.255的地方,必須到10.8.0.2的門口排隊
  2. 封包-b想去192.168.1.1~192.168.1.255的地方,必須到0.0.0.0的門口排隊
  3. 不想去上面二個地方,而想去別處的,就通通到192.168.1.254的門口排隊

想去的地方,就是routing-table上的dest(目的地),門口就是gateway,dev指的就是你的實體設備(電腦中叫網路卡)

所以我以vpn+nat的方式來表述一下

vpn-client[10.8.0.10/32]/tun0-vpn-server[10.8.0.1/32]/tun0-vpn-gateway[10.8.0.2/32]
eth0-實體網路[192.168.1.1/32]/eth0-實體網路-gateway[192.168.1.254/32]
表a就是這一台啟動vpn服務的routing-table

以一般我們vpn-server-conf的預設,若無特別設定的話,client端除了本身自有的網路產生的路由表(routing-table),還會因為連上vpn-service時產生的dest:10.8.0.0/24,gateway:vpn_gateway(絕對不會是10.8.0.2/32,因為vpn的gateway是vpn-service去操控的,只要你設定正常…基本上不用理)

所以到這面為止,綜合basic-setting的話,你會發現,vpn只有讓10.8.0.0/24互通而已…也就是client[10.8.0.10]可以連到server[10.8.0.0/24]…這也就是server.conf中client-to-client的用意(不過,不啟用client-to-client也會有這個routing…因為這算是vpn-lan中的default-route…client-to-client只是告訴vpn-service,client們可以互相連繫)

但我用vpn是為了可以方面連到學校內部,因為學校有一些內部的管理只能允許校內ip,所以,vpn就得配合nat的方式出去

在[OpenVPN–純架設-by ssl]的routing/nat/forward做過說明了…所以,在此我就先當做你server端的vpn-input/output/forward/nat已設定在iptables上了…接著,我就來說說怎麼設定routing-table

在server.conf中,你會看到一些用[push “xxxxxxxxxxxxxxxxxx”]的東東,這push的意思就是把後面引號中的東西設定到client去…若你在server.conf看到[xxxxxxxxxxxxxx]沒引號也沒push的話,那代表是設定在server上…以上我舉幾個例子

a—[讓vpn-client可以透過vpn的tunnel連到學校192.168.10.0/24區域]

在server.conf寫:
push “192.168.10.0 255.255.255.0”
上面的意思轉成手動寫routing-table的話就是
[route add 192.168.10.0/24 vpn_gateway dev tun0]

b—[讓vpn-client可以透過vpn的tunnel連到學校192.168.10.0/24區域,但192.168.10.5/32不希望client用vpn-tunnel]

在server.conf寫:
push “192.168.10.5 255.255.255.255 net_gateway”
push “192.168.10.0 255.255.255.0”
跟a的意思一樣,只是192.168.10.5/32特別指定不要用vpn_gateway,而照client的default_gateway走

以上兩個,只要你本身server的forward與nat在iptables設定正確的話…你可以在client用trace-route去測,正確的trace-route的表應該是

client-windows-xp
cmd<—-tracert 192.168.10.1
1 1ms 1ms 1ms —- vpn_gateway(10.8.0.1)
2 ?ms ?ms ?ms —- 192.168.1.254(server-eth0-gateway)
3 ?ms ?ms ?ms —- 192.168.10.1
當然,2跟3中間會因為你經過的網路設備而有其他的gateway會回應

如果你trace-route的第一個gateway不是vpn_gateway的話,那你最好檢查一下你client的routing-table…因為,如果你client本身所在的網路就是在192.168.10.0/24的話,基本上,應該不會走vpn_gateway
又或者你自己已有設定routing-table在client端…要記住一件事,routing-table的優先順序會從最小範圍先走<—不懂啥意思,沒關係,我再舉個例子,我假設有底下routing-table-表b,如果我現在要連1.1.1.1,1.1.2.1,1.3.1.1,4.1.1.1,1.1.1.129會怎麼走

routing-table-表b
dest,gateway
1——1.1.1.0/24,gw-a
2——1.1.1.128/25,gw-e
3——1.1.0.0/16,gw-b
4——1.0.0.0/8,gw-c
5——0.0.00/0,gw-d

1.1.1.1—->gw-a
1.1.2.1—->gw-b
1.3.1.1—->gw-c
4.1.1.1—->gw-d
1.1.1.129–>gw-e
其實重點只有1.1.1.1跟1.1.1.129…這兩是同一個class-c,為什麼1.1.1.1會走gw-a,而1.1.1.129不走gw-a而走gw-e
因為routing-table中的1—>1.1.1.0/24—>範圍是指1.1.1.0~1.1.1.255—>256
而2—->1.1.1.128/25—>範圍是指1.1.1.128~1.1.1.255—>128
routing會挑範圍小的先走…就是這意思…(不過上面的算法應該是不會把網路位址跟廣播位址算進去啦)

以上…就是小小的說明在OpenVPN中,怎麼設定server/client的路由走向…
設定的好的話,基本上可以在server把openvpn的服務多開幾個,設定多個tun/tap的虛擬網卡,server.conf也可以寫多個不同的…記得port要用不同的,然後你就可以控制什麼使用者用啥port連入vpn-server時,會走什麼樣的routing…這樣也不怕會有人偷渡…

當然,server可以多config開多,client也行…但如果你server或client是windows的,記得要手動新增vpn虛擬網卡,各設定檔之間是不能共用一個虛擬網卡的,記得,dhcp給的ip最好也自己設定一下…反正虛擬ip蠻多可以用的…

class-A->10.0.0.0/8
class-B->172.16.0.0/11
class-C->192.168.0.0/16

應該吧…不然就google查一下就行了

[轉貼]OpenVPN完整SSL設定

因為作者寫得太優了,字字是重點
所以只好全轉貼了,有些部分我還看不太懂
放在這裡留著慢慢看

真的很謝謝原作者,因為這份資料他把VPN遺漏的NAT和iptables設定都加入進去了
VPN我之前有設定成功連線過,但除了ping,其他都無法使用
但又把client強制把gateway設定到server端上,因沒有配套措施
導致client整個斷線….:(

看到這篇我又有動力想嘗試了,看來只能在linux下才能發揮OpenVPN的全功能
(windows版就殘念….我再找文章看看)


2010/2/12補充:文章終於看董一些了,也可以正常用VPN來上網
看還是搞不定VPN存取server網路內的電腦= =

以下試做發現的勘誤,直接改上去

———————————————————————————————–

原文出處http://cheaster.blogspot.com/2009/11/openvpn-by-ssl.html

參考網頁:
1-http://ssorc.tw/rewrite.php/read-265.html
2-http://justshark.blogspot.com/2006/05/openvpn.html
3-http://blog.roodo.com/candyz/archives/283944.html
4-http://theitdepartment.wordpress.com/2009/06/08/openwrt-openvpn-routed-lans/
5-https://forum.openwrt.org/viewtopic.php?id=6576

我的openvpn是上rpm-pbone上找的,因為懶的用source去做…就找fc8的rpm上來裝

裝好後,你會在/etc/openvpn底下發現easy-rsa的資料匣,進入裡面的2.0…

接著,我從上面的五個參考網頁上看出幾個重點:

  1. ssl的server與client憑證
  2. server與client的config設定有七、八成要一致
  3. 如果你server是在unix-like上架設的,那就不僅只是把vpn-service啟動就好了,還要做封包的forward跟nat
  4. 在server的config上定義client的routing-table要特別注意…沒必要把default route做到vpn-gateway上就別做…(我個人認為啦)

ok,以上四個重點也是建置的幾個步驟,接下來就一個一個來吧

[1. ssl的server與client憑證]

Johnny註:關於這部分我會重新整理這段的做法,最常見犯的錯誤是在變數宣告上,指令為

. ./vars

其他依序

./clean-all
./build-ca
./build-inter 主機名字

注意主機名字不可重複,其他照提示作就可以了
可參考

http://fedoraproject.org/wiki/Openvpn

我之後會重新整理這段文章

[2. server與client的config設定有七、八成要一致]

server端(linux-fedora-8):
依參照網頁3上說的,把ca.crt/ta.key/dh1024.pem/server.* 從easy-rsa/2.0/keys下拷到/etc/openvpn,然後再把/usr/share/doc/openvpn-版本/sample-config-files/server.conf也拷到/etc/openvpn底下。
然後,編輯server.conf,主要要修改的地方有

  • local主機ip位置
  • port(我用預設1194)
  • proto(我用tcp)
  • dev(我用tun)
  • ca(指定ca.crt位置)
  • cert(指定server.crt位置)
  • key(指定server.key位置
  • dh(指定dh1024.pem位置
  • server ip mask(我用預設的10.8.0.0/24)
  • ifconfig-pool-persist ipp.txt(預設值)
  • push “route network mask”(這要點4要注意的,這是是修改client的routing-table,假設我要讓連上vpn的client可以存取或連線至vpn-server區域的某一塊的網路區域,就要增加這一行,例:讓client可以連至server網路區的192.168.111.0/24,那這一行就要寫成push “route 192.168.111.0 255.255.255.0”)
  • push “dhcp-option DNS ip-address”(vpn的虛擬網卡也是要用dns的,但建議這dns要在包在routing-table會從vpn-gateway走的範圍)
  • client-to-client(讓使用vpn的client們可以各自相連繫)
  • keepalive a b(預設值a=10/b=120,每a秒會由server向client詢問有沒有活著,若長達120秒沒回應,則server會判定client已失聯)
  • tls-auth ta.key-address 0/1(第一引數是指定ta.key的位置,第二引數0->server使用/1->client使用)
  • comp-lzo(使用lzo的連線壓縮技術)
  • max-clients num(最大同時使用vpn連上server的人數)
  • user/group(在unix-like的os上,讓vpn的service用daemon來啟動,windows就不用了)
  • status status-log-file-address(設定vpn-status的記錄檔的位置)
  • log/log-append log-address(openvpn-service的記錄檔位置)
  • verb num(log等級)

若沒提到的,就使用預值狀態吧,接著,請先到firewall把tcp-1194的port開放,然後啟動openvpn(service openvpn start),如果啟動正確的話(service openvpn status),就會在網路狀況(netstat -tlunp)上看到1194已被openvpn使用,然後log也可以讓你檢查一些狀況。接著看client的設定

client(windows XP):
在windows上要用openvpn,就要至官網下載openvpn-gui,找stable,我在用的時候是1.0.3,下載Installation Package後大部份都使用預設值安裝即可,不過,next不要按太快,到了安裝元件的選擇(Choose Components)時,多勾一個My Certificate Wizard(這是我的建議,不勾也無關緊要);安裝中途會有一個驅動的安裝,那是虛擬網卡,然後應該就安裝結束;裝完之後,有裝firewall的人請把openvpn-gui的應用給開放…
再來,在openvpn-gui的安裝路徑中有一個sample-config,把裡面的client.ovpn拷一分到openvpn-gui/config底下,接著,再到server端下載ca.crt/ta.key/你要開放的用戶要用的xxx.crt、xxx.key、xxx.csr,也放在config底下…當然,你要在windows上重做一份這一些檔案也行啦,方法跟server的產生方式一樣,但記住,vars中的KEY_xxxxxx的設定要跟server的一模一樣
接著,編輯client.ovpn

  • client(就是指client的意思,預設是開啟)
  • dev tap/tun(server用什麼,client就要用什麼,所以我是用tun)
  • proto tcp/udp(server用啥,client就要用啥)
  • remote server-real-ip(就server在網路上的ip-address)
  • resolv-retry infinite(重新測試…預設開啟)
  • nobind(預設是nobind)
  • ca/cert/key(跟server一樣意思,就是指定這三個東西的位置,但注意,cert/key是要用client,不是server.cert/server.key唷)
  • tls-auth ta.key-address 0/1(跟server那解釋的一樣,但第二引數在client要改1)
  • comp-lzo/verb 3

client要設定的不多,因為大至上都是預設值,所以也不用怎麼更動

3. 做封包的forward跟nat

這是我一開始卡很久的地方,因為,網路上很多教學都沒說了這一塊,但實際不說也沒錯,因為vpn的用意並不是讓你因為這樣的而繞行方便,但這其實就是一種route and nat的方式,很像一種load-balance(如果你vpn很多的話)

  1. 啟用forward功能[echo “1” > /proc/sys/net/ipv4/ip_forward]
  2. 讓vpn的虛擬網卡在server開放input/output
    input[iptables -A INPUT -i tun+ -j ACCEPT]
    output[iptables -A OUTPUT -o tun+ -j ACCEPT]
  3. 開放server端的vpn與實體網路進出FORWARD
    eth->vpn[iptables -A FORWARD -i eth* -o tun+ -j ACCEPT]
    vpn->eth[iptables -A FORWARD -i tun+ -o eth* -j ACCEPT]

    注意,eth*的星號,指的是你實體網卡的編號,建議指定一張就好…因為我不肯可否用eth+

Johnny註:文中的eth*指的是對外的網卡介面,例如:ppp0或eth0
目前如果要用VPN上網的話,還是只能架在Linux上
除非windows上有封包轉遞的軟體可以處理

參考http://openvpn.net/index.php/open-source/documentation/howto.html#redirect
http://fedoraproject.org/wiki/Openvpn

  1. 啟動nat,由source 10.8.0.0/24傳來的會走eth*出去
    [iptables -t nat -A POSTROUTING -s 10.8.0.0/24 -o eth* -j MASQUERADE]
    eth*這裡的星號是指你10.8.0.0/24要nat從哪一張網卡走出去,然後nat後的ip是那張網卡的

上述指令在server(unix-like os 適用)輸入就ok了

4. routing-table

主要設定就是在server.conf的push “route a.b.c.d x.x.x.x”這裡,就是,當你client要連a.b.c.d/x.x.x.x這網域時,才會往vpn-gateway走,若不是這一個網域的,就會走client其他的網路設定。如果你覺得,我連上vpn就是都只走vpn的話…那你就不用設定route,你直接在server.conf上,寫入[push “redirect-gateway”]就行了,這樣client的default-gateway會改成走vpn-gateway,幾乎就是叫client只走vpn了

以上四個是我實做二天openvpn的重點,實際上,照著參考網頁走就可以讓server啟動正常…但唯一就是routing-table的設定跟package-forward與nat的部份還是得詳研… 

Johnny註:正常的log長這樣

http://openvpn.net/index.php/open-source/documentation/howto.html#start